Know Your FSMO Locations 
Make sure that the DC you are removing is not holding any of the FSMO Roles
- On any health domain controller, click Start, click Run, type Ntdsutil in the Open box, and then click OK
- Type roles, and then press ENTER
- Type connections, and then press ENTER
- Type connect to server
, where is the name of the server you want to use, and then press ENTER - Type quit, and then press ENTER
- Type select operation target, and then press ENTER
- Type list roles for connected server, and then press ENTER
- Review the listed roles and their host, if the DC that wish to remove is not listed proceed to step 4
Seizing FSMO Roles (The Last Resort) 
If for what ever reason you can not do a clean transfer you will need to seize it
- On any health domain controller, click Start, click Run, type Ntdsutil in the Open box, and then click OK
- Type roles, and then press ENTER
- Type connections, and then press ENTER
- Type connect to server
, where is the name of the server you want to use, and then press ENTER - Type quit, and then press ENTER
- Type seize
, where is the role you want to seize - You will receive a warning window asking if you want to perform the seize. Click on Yes
Do not put the Infrastructure Master (IM) role on the same domain controller as the Global Catalog server. If the Infrastructure Master runs on a GC server it will stop updating object information because it does not contain any references to objects that it does not hold. This is because a GC server holds a partial replica of every object in the forest.
Transferring the any hosted FSMO Roles 
For the RID, PDC, and Infrastructure Master
- Click Start, point to Programs, point to Administrative Tools, and then click Active Directory Users and Computers.
- Right-click the icon next to Active Directory Users and Computers, and then click Connect to Domain Controller.NOTE: If you are not on the domain controller where you want to transfer the role ,you need to take this step. It is not necessary if you are connected to the domain controller whose role you want to transfer.
- Click the domain controller which will be the new role holder, and then click OK.
- Right-click Active Directory Users and Computers icon, and then click Operation Masters.
- In the Change Operations Master dialog box, click the appropriate tab (RID, PDC, or Infrastructure) for the role you want to transfer.
- Click Change in the Change Operations Master dialog box.
- Click OK to confirm that you want to transfer the role.
- Click OK.
- Click Cancel to close the dialog box.
For the Domain Naming Master role
- Click Start, point to Programs, point to Administrative Tools, and then click Active Directory Domains and Trusts.
- Right-click the Active Directory Domains and Trusts icon, and then click Connect to Domain Controller.NOTE: If you are not on the domain controller where you want to transfer the role ,you need to take this step. It is not necessary if you are connected to the domain controller whose role you want to transfer.
- click the domain controller that will be the new role holder, and then click OK.
- Right-click Active Directory Domains and Trusts, and then click Operation Masters.
- In the Change Operations Master dialog box, click Change.
- Click OK to confirm that you want to transfer the role.
- Click OK.
- Click Cancel to close the dialog box.
For the Schema Master Role 
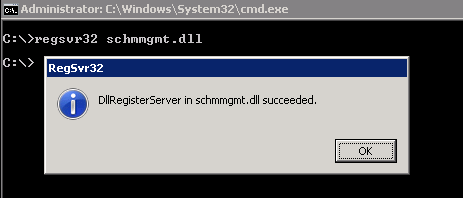
- Open a command prompt and type:
regsvr32 schmmgmt.dll

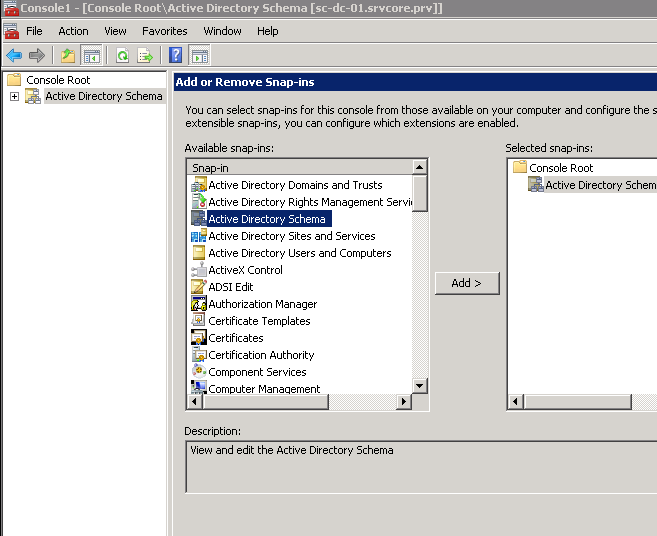
- Click Start, click run, type mmc, and then click OK.
- On the Console, menu click Add/Remove Snap-in.

- Click Add.
- Click Active Directory Schema.
- Click Add.
- Click Close to close the Add Standalone Snap-in dialog box.
- Click OK to add the snap-in to the console.
- Right-click the Active Directory Schema icon, and then click Change Domain Controller.NOTE: If you are not on the domain controller where you want to transfer the role ,you need to take this step. It is not necessary if you are connected to the domain controller whose role you want to transfer.
- Click Specify Domain Controller, type the name of the domain controller that will be the new role holder, and then click OK.
- Right-click Active Directory Schema, and then click Operation Masters.
- In the Change Schema Master dialog box, click Change.
- Click OK.
- Click OK .
- Click Cancel to close the dialog box.
Attempt a Force Removal 
- As a Domain Admin and in a command prompt type dcpromo /forceremoval
- If the force removal did not work pull the plug (or shut down properly) and never every turn it back on while connected to the network
Clear the Metadata from AD 
- On any health domain controller, click Start, click Run, type Ntdsutil in the Open box, and then click OK
- Type metadata cleanup, and then press ENTER
- Type connections, and then press ENTER
- Type connect to server
, where is the name of the server you want to use, and then press ENTER - Type quit, and then press ENTER
- Type select operation target, and then press ENTER
- Type list domains, and then press ENTER
- Type select domain [n], [n] representing the domain, and then press ENTER
- Type list sites, and then press ENTER
- Type select site [n], [n] representing the site, and then press ENTER
- Type list servers in site, and then press ENTER
- Type select server [n], [n] representing the DC to be removed, and then press ENTER
- Type quit, and then press ENTER
- Type remove selected server, and then press ENTER
Cleanup DNS by Removing all References to the Removed server
- In the DNS snap-in, right click domain.whatever and Properties
- Click on Nameservers tab: remove server
- Repeat the above instructions for Reverse lookup and all zones
- Open up _msdcs and check all folders within for server name or ip reference
- Repeat the above step for _sites, and all others
- Repeat the above steps for the Reverse Lookup Zones
In Active Directory Sites and Services - delete server