In the Windows Server 2012 R2 environment, redirecting Users’ files to a common storage area is sometimes the most practical path of action. If you’re learning the OS for the first time, enabling folder redirection might not be so intuitive. Luckily, Microsoft has provided a simple and easy way to do this on the domain or OU level.
This tutorial will focus on enabling redirection and verifying that it is correctly applied. Let’s see if we can redirect the individual user’s Pictures files to a folder on our file server, called ScottFile.
The first thing you want to do is to use Server Manager to access the Group Policy Management console in an account that has permission to edit Group Policy.
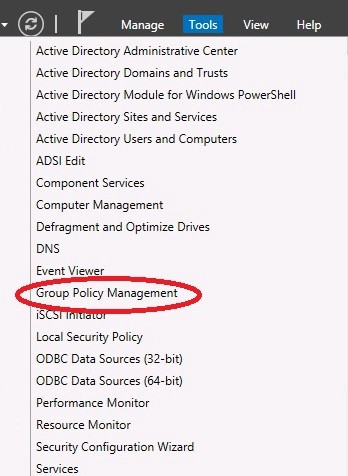
Select Group Policy Management from the Tools dropdown list.
Next, from the Group Policy Management Console, right-click the Group Policy Objects OU and select New. You will be prompted for a name and whether or not you want to use an existing template for your new Group Policy. I named mine Folder Redirect.
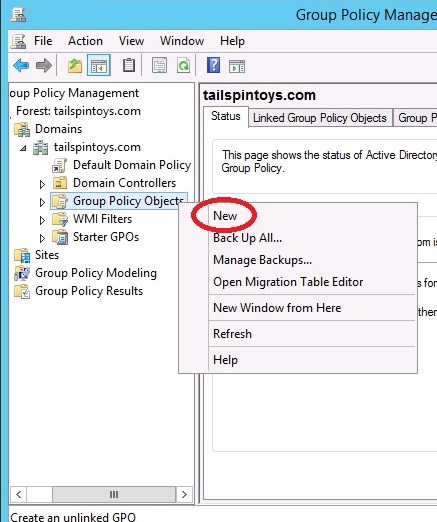
Note: you can also right-click the domain or OU that you want to link the GPO to, and select “Create a GPO in this domain, and link it here.”
After you choose a name, the Group Policy Editor opens. From here, you are going to navigate to the Folder Redirection options in User Configuration and choose the folder that you want to redirect (User Configuration/Policies/Windows Settings/Folder Redirection/Pictures).
Notice that you can choose from any of the folders that are are default folders for user accounts. Right click on the folder, and select Properties.
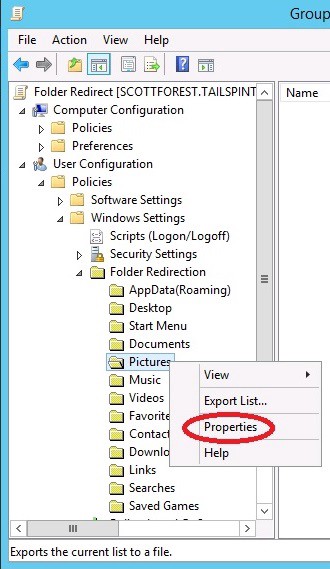
User Configuration\Policies\Windows Settings\Folder Redirection\Pictures
At the Properties tab, select the type of redirection and the path to the new folder. Here, we are doing a basic redirection, which will redirect all user Pictures folders to the same location. The folder we are sending it to is the PicturesRedirect folder on the file server ScottFile. Your file path is going to use the format: **\hostname\foldername\subfoldername**.
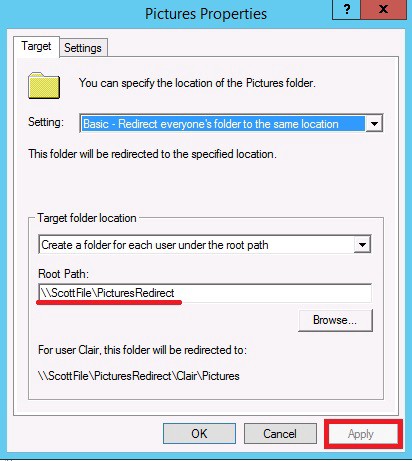
Note the file path and the example for the individual user.
Apply these changes and you will receive a message informing you that not all folder redirection features are available in previous versions of Windows Server. Make note of this and click Yes.
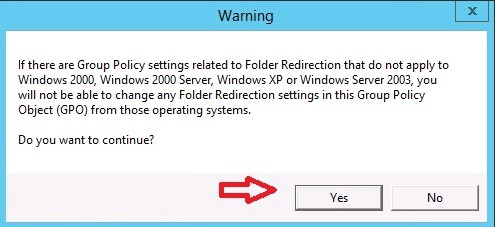
Some features of folder redirection are not backwards-compatible.
Back in the Group Policy Management Console, right click on a domain or OU. From here, you can choose Link an Existing GPO and choose the Group Policy Object that you just created.
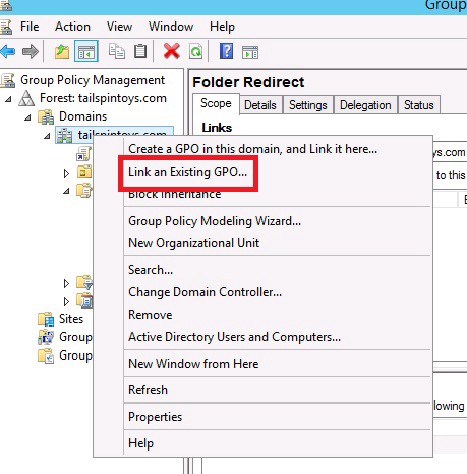
Link the GPO to the domain.
Now, your new Group Policy should be active, but to make sure that your computer applies these settings, force an update with the command line command: gpupdate /force
Notice that in order for this particular policy to take effect, the system will need to log out the current user. Choose Yes and wait for the system to sign you out.
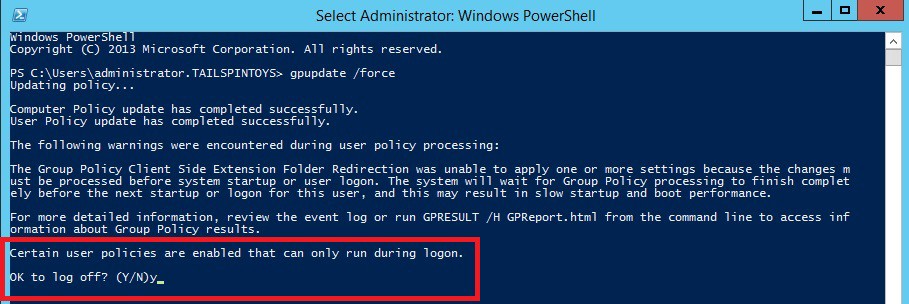
This is forcing an update of Group Policy, which requires the user to sign out for it to take effect.
Once you sign back in, you will need to test your redirection. Go to the folder you are redirecting and create a new text file.
After that, you’ll need to access the location your folder is being redirected to. Sign in to the host that will be hosting your redirection (in this case, it’s our file server ScottFile), and find that folder! In the example below, notice that the text file appears in the PicturesRedirect folder that you assigned it to.

Note the file path and the redirected file.
If your new file doesn’t appear, consider going back to your new GPO and making sure that the file path is correct. Also, make sure that the folder you are redirecting it to actually exists.